Cron jobs are functions in cPanel that allow users to run commands and programs automatically. Setting up a cron job in cPanel involves using the Cron Jobs interface to schedule commands or scripts to run automatically at specified intervals. Here's a step-by-step guide:
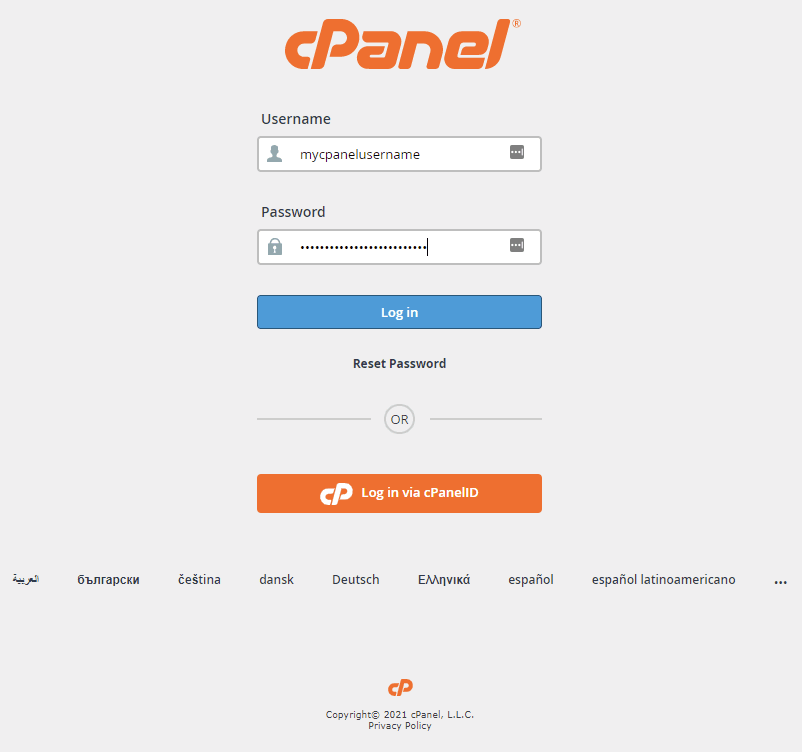
1. Log in to cPanel:
Open your web browser and enter the URL for your cPanel dashboard. Log in using your username and password.

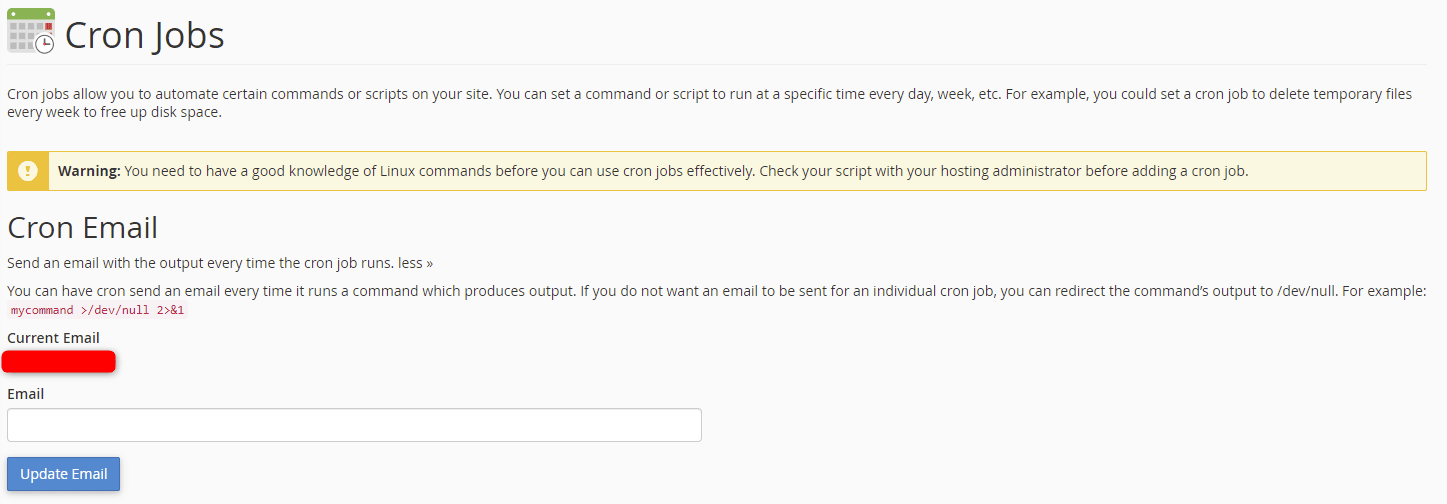
2. Locate the Cron Jobs icon:
In the cPanel dashboard, look for the "Cron Jobs" icon or find it in the "Advanced" or "Metrics" section.
3. Access the Cron Jobs interface:
Click on the "Cron Jobs" icon to access the Cron Jobs interface.
![]()
4. Add a new cron job:
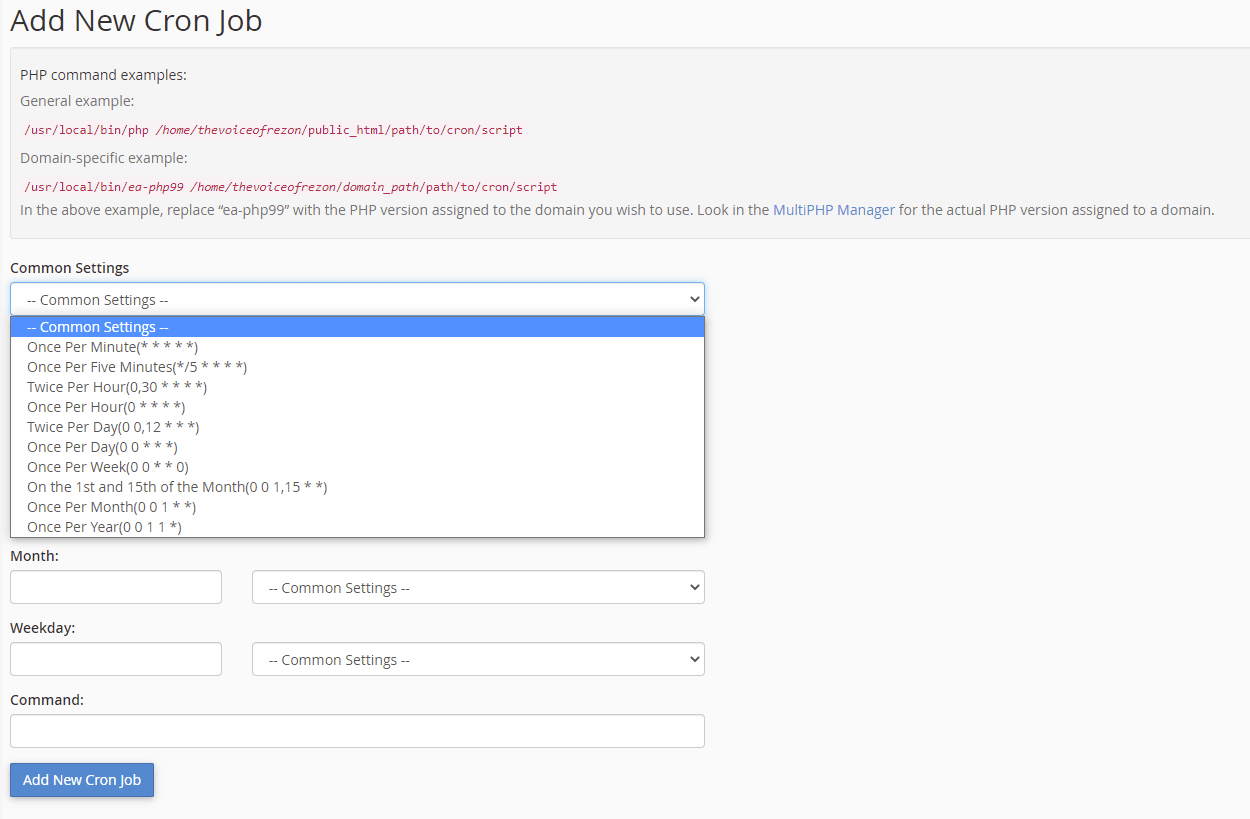
In the "Add New Cron Job" section, you'll see various options to configure the cron job.

5. Choose the cron timing:
a. Common Settings: You can select a pre-defined schedule, such as "Once Per Hour," "Every Day," etc.
b. Minute, Hour, Day, Month, Weekday: Alternatively, you can set the specific timing using these fields.

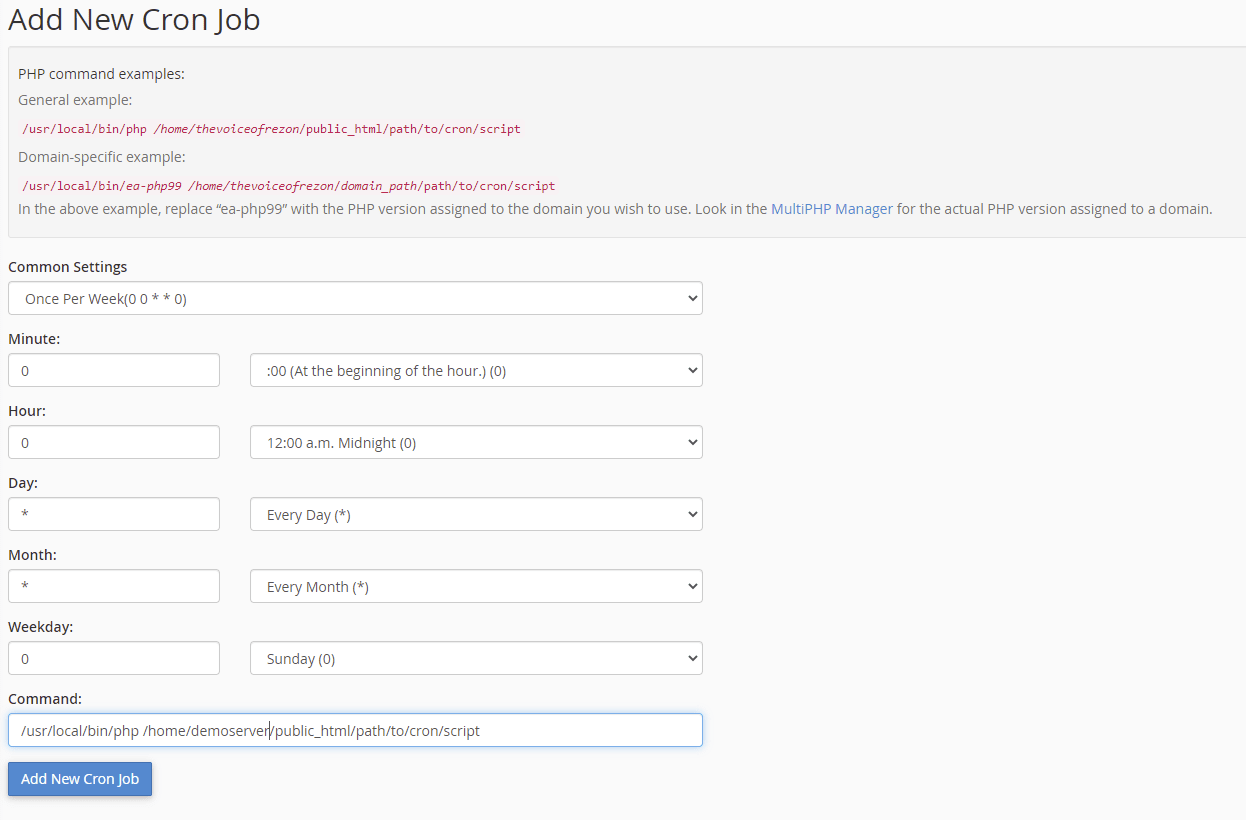
6. Enter the command to execute:
In the "Command" field, type the command or script you want to run. For example:/usr/bin/php /home/username/public_html/path/to/your/script.php
Replace "username" with your cPanel username and adjust the path and script file accordingly.

7. Save the cron job:
Click on the "Add New Cron Job" button to save the cron job.
8. View and manage existing cron jobs:
Below the "Add New Cron Job" section, you can view and manage existing cron jobs, including editing or deleting them.

9. Edit or delete a cron job:
To edit or delete a cron job, find it in the "Current Cron Jobs" section and use the corresponding actions.
10. Test your cron job:
After setting up the cron job, test it to ensure it runs as expected at the specified intervals.
Remember to replace placeholders like "username" and adjust paths and filenames according to your specific setup.

